.png)
Happy Haunting - Halloween Decor on a Budget
- Oct 26, 2020
- 7 min read
Updated: Nov 22, 2020
My favorite holiday of the year is in a week and usually I'm so excited. This year though my preparations have been a little lack luster because there will be no trick-or-treating, no dressing up, nothing that really makes Halloween...well...Halloween. Last year I envisioned spending this Fall making giant fangs for my front porch a la Christine McConnell's transformation of her parent's home seen here, but that didn't materialize.

By the way, if you don't know who Christine McConnell is I suggest you take a leap down that rabbit hole and visit her on Instagram and You Tube. She's an artist, photographer, baker and all around creative who makes every day into Halloween. She falls into the category of people I seriously love that I've never even met. This house is bonkers and so is everything she does.
In contrast here's a picture of the sad state of affairs on my front porch this year. Just to the left is a small "graveyard" we installed that I didn't even bother to snap pics of. It's not horrible, but it's not inspiring either. The whole thing is made more sad by the fact that we removed all the overgrown landscaping this summer and haven't had a chance to replace it yet. Right now I'm just pretending that the facade of my house doesn't exist so I don't have to be disappointed by it, but there's enough there to argue I made a passable effort.

Inside I made considerably more effort because I have to look at it every day and I needed some semblance of Halloween normalcy. I like to pick up a few new things every year and I typically go for bang-for-my-buck purchases since I have a lot of space to decorate. I'm going to share a few of my low cost/no cost decorating tips so you can throw something together too without a lot of fuss.

This is a vignette in the corner of my living room. I photographed it on a rainy day because this particular room is south facing and usually very bright. I don't really go in for cute Halloween decorations. My goal is to make my house look like something out of an Edward Gorey illustration which distresses my daughter to no end. She forbade me from putting some of the more disturbing things out this year because she doesn't want to have nightmares. Gotta respect that.

I usually drape all of my furniture in sheets like this. It gives the whole place an air of abandonment. I highly recommend it, but I was not allowed to do it this time around. A couple of years ago I got a bunch of cheap white sheets off of Amazon (similar here) and threw them over everything. It's quick and inexpensive and instantly makes a huge impact on a space. If you have colored or patterned furniture it also gives you a nice neutral ground to start decorating against.
In the vignette above you can see that I also have cheesecloth draped over my lamps. I aged it by staining it with tea and tore holes in it so it looks like a cross between Miss Havisham's wedding veil and cobwebs. Cheesecloth is cheap, easy to get and very versatile. It's also reusable every year and made of cotton, so much better for the environment than those fake cobwebs. Here are a couple more ideas for using it...

I ran across this picture and couldn't find the source for it, but I can tell you generally how to make it. Cover some furniture in plastic (do this outside because it's going to be messy). Dip strips of cheesecloth into a bucket of liquid starch, squeeze the excess out, then drape away. Let it dry and lift it off the furniture. It should stand on its own like this. Imagine all the shapes you could make!

Unknown source
If you want to keep your front porch from looking as sad as mine, you can use cheesecloth to create a spooky drape like this one. Again, I couldn't find an original source for this but all you do is tea stain, tear and hang. Very inexpensive and very easy. You don't even have to be a crafting genius to make this work. You could also do this in doorways or over windows throughout your home. Have fun with it!
Unknown source
The Nightshade Jar in my vignette above is actually a candle and is from John Derian's Halloween collection for Target, as is the bone tray that everything is corralled on. John Derian is a designer and shopkeeper out of New York that is know for his decoupage pieces using vintage images. I love his work so I scooped up a few of his things from the collection. I also have this cemetery tray which you will see in another picture below. The whole collection is very well priced.


The berry branch in my picture was a target find a couple of years ago but you could get a similar look by throwing some bare branches in a vase which I have done in the past. I actually recommend that to purchasing something because you can prune the dead wood off your trees and get some free decor all in one go! Also when you're done with it you can just put it in the yard waste bag with the leaves instead of having to store it. Win-win-win. Is that a thing? This sideboard arrangement is a good example.
The skull and rat skeleton I used can be found all over the place this time of year. I've linked to some just for convenience but I've been told you can even pick them up at the dollar store so don't pay a lot for these! I love skulls in particular because of their versatility. Here's a little more inspiration.


via The House that Lars Built, Honestly Yum, and Porch respectively

This is one corner of my mantel with a silk flower arrangement in an urn. I chose the flowers based on how dead they looked. I stuck to black, sickly beige, pale mauve and a blood red color. I threw some brown leaves in there for good measure. The amaranthus hanging down reminds me of funeral flowers. I honestly can't remember where I got the urn but it's metal and it's heavy. The one I linked to is fiberglass and the only one I could find that is the right size, but I know I didn't pay that much for mine. I suggest you search around a little. You're bound to find something more reasonable. The silk flowers were from JoAnn but feel free to cut all the dead flowers out of your yard and throw them in a vase. Here's a little more inspiration for Halloween flower arrangements.


Again I draped some cheesecloth across my mantel and the little tombstone-shaped chalkboard was a Target find from a few years back. A quick search on Etsy pulled up a few options though which I have linked to. There's a black vine garland laying across everything. I don't remember where I got that either, but JoAnn has a black twig garland on sale right now that would look similar. I also have a couple of fake roaches thrown in for good measure. They can be a creepy little surprise on their own, but look great en masse as well. I couldn't put them down low anywhere this year because we have a new puppy that likes to chew, but in past years I've made it look like they were crawling out of the air vents. Good Halloween fun.

Here you can see the John Derian cemetery tray I showed you earlier. I paired it with a crow and a little black tree on top of my secretary. Inside the secretary are some jars with labels for things like poison, spider fangs, lizard tongue etc. I picked a lot of them up at the dollar spot at Target but these are super easy to make as well. Just search for "Halloween apothecary labels" and you will turn up a lot of free options. Print these out and glue them to some old jars and bottles. All of the books here were from the used book sale at my local library. I headed to the murder mystery section and picked up all the creepy titles I could find. They were all less than $1 a piece and I supported my local library. That spooky face on the bottom shelf was an outdoor decoration that broke so I tucked it in here. It looks great peeking through the glass. An old costume mask would have the same effect and let you reuse something that's just sitting around.
The candles I use are a mixture of real wax and flameless candles that I have collected over the years and I scatter them around everywhere. I prefer the flameless ones. Less mess and I don't have to worry about watching them. They also make the rounds for Christmas...and Thanksgiving, Easter, Valentine's Day...you get the picture, so I definitely feel like I get my money's worth. Another item I make frequent use of is candlesticks because they also work well at other holidays. If you're going to buy something make it work year round. Below is some candlestick inspiration for your viewing pleasure. I like the last one in particular because it uses a tree branch as well, painted black.


via Martha Stewart, SacredWildWood, and Cupcakes and Cashmere respectively

If you can't spring for candlesticks, or just don't want to, you can always use wine bottles. Paint them black for an effect like you see here. A can of spray paint is around $4 at the hardware store and can go pretty far. Spray your tree branches while you're at it!

Okay, one more budget tip and I'll be done. I haven't even shared half of my ideas and this is already longer than I expected. I love to print out creepy pictures and replace all my framed art with them. This one sits on a bookshelf in my living room. I've linked to a few below, including the one I've used here, so you can get started.
(The owl and snake were again, from JoAnn. I have so much decor from them because they have amazing sales even before the holiday hits. Sometimes I get this stuff for 20% of the original price!)

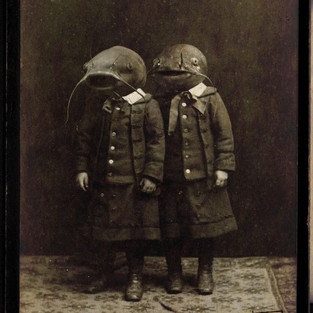


via Lovecraft's Secret Archives, Imgur, and Paler Than Mauve respectively
Happy Haunting everyone!
You can receive notifications of new blog posts by clicking on the "Sign Up" button at the top of this page.
If you need assistance designing your own home and you would like to work with me, you can click "Contact" on the menu bar above to message me.
This post may contain affiliate links.


Comments